Although it sounds difficult, slow cooking ribs on a Weber grill (and on other brands, for that matter) is fairly easy.
You just need to know the right steps, what to do, and things to avoid.
Each grill type has its own specific instructions but all of them have these steps in common:
- Season the ribs
- Set the grill to indrect cooking
- Preheat the grill to 225°F – 250 °F (110°C – 120°C)
- Cook the ribs for at least 3 hours
In this in-depth guide, you’ll exactly know how to slow cook ribs on all types of grills (not just Weber):
for easier and better understanding, I’ll provide a video.
Also, as a bonus, I’ll show you tips and tricks on both what to do and what not to do (I suggest you read this part first).
How to Slow Cook Ribs on a Weber Gas Grill
Note: the video uses a bit different method than the one I described. Both are great and I recommend you try them both.
If you ever smoked on a gas grill before, you know that the gas itself (be it propane or natural gas) doesn’t produce any smokey taste as charcoal and wood pellets/chips do.
Technically speaking, you don’t need smoke when slow cooking ribs on a Weber grill. But if you don’t, why bother? It would be much simpler to do it in the oven, then.
More on this later. First, let’s prepare the ribs first.
1. Prepare the Ribs
- Rinse the ribs
- Remove the silver skin/membrane
- If you don’t, it becomes like rubber once cooked
- Also, the seasoning and smoke won’t penetrate the meat that good
- See this video on how to do it fast and simple
- Dry the ribs by patting them with a lint-free towel
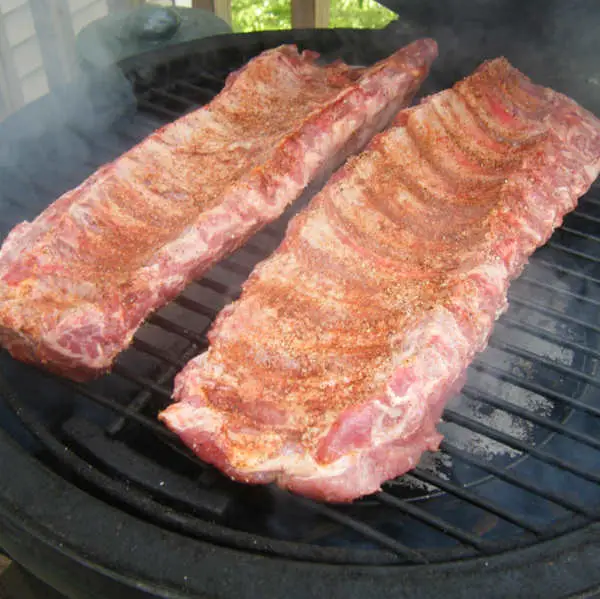
- Add the rub
- Be generous
2. Start the Grill
- Fire up just one burner
- Preheat the grill to about 250°F or 120°C
3. Prepare the Smoke Box
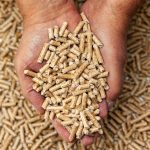
You can smoke using wood chips or pellets.
If you’re using chips, you need to soak them beforehand.
There are many ways to smoke on a gas grill:
- Smoker box method
- Pellet tube method
- Pan method
- Smoke bomb method
I won’t go into details because I already did this in a previous article.
PS: don’t worry if you can’t afford a smoke box. Making one is simple and doesn’t cost you a cent. To do this, just need a sheet or two of aluminum foil which most homes (if not all of them) have.
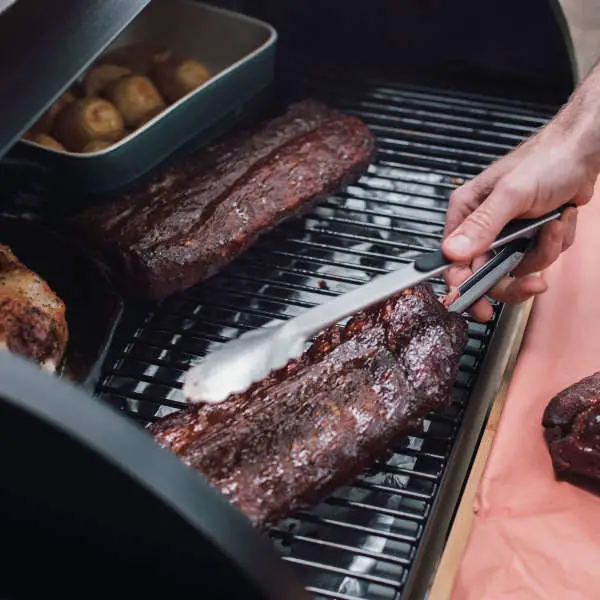
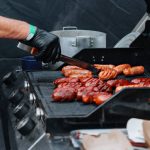
4. Start Cookin’
- Place the smoke box above the lit burner
- Place the ribs meat side down and away from the heat
- Cook them for about 3 – 4 hours, depending on how tender and juicy you want them
You can leave the ribs completely alone during cooking or you can flip them after an hour and a half.
5. Enjoy
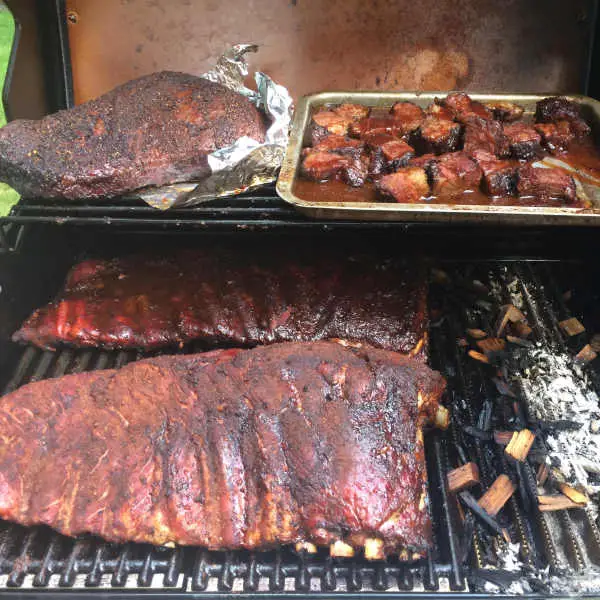
Take the ribs off the grill.
You can either eat them like they are or you can add some BBQ sauce and cook them on high heat for a few minutes more on each side.
Side note: I’ve been using this model for years and the results have always been amazing.
How to Slow Cook Ribs on a Weber Charcoal Grill
Unlike with a gas grill, you don’t need a separate smoker box as the charcoal itself produces enough smoke.
You can, however, mix some pellets or chips with charcoal. This will enrich the flavor even more.
There are a couple of ways to cook ribs on a charcoal grill. This depends on how are going to arrange the charcoal.
The most common methods are:
- The bank method
- The snake method
There are other methods but I’m going to address these two here.
Why? Because they are free – you don’t need any additional gadgets or mods and are easy to set up.
Let’s get started:
1. Prepare the Ribs
- Rinse the ribs
- Remove the silver skin/membrane
- If you don’t, it becomes like rubber once cooked
- Also, the seasoning won’t penetrate the meat that good
- See this video on how to do it fast and simple
- Dry the ribs by patting them with a lint-free towel
- Add the rub
- Be generous
2. Prepare the Grill
Arrange the charcoal to your liking.
In either case, the grill must reach about 250°F or 120°C before you start cooking.
You can also add an aluminum pan filled with water or apple juice but this is optional.
The Bank Method
This is the simplest layout.
Here you just place the charcoal on one side of the grill and the ribs on the other.
You can make a wall out of bricks. This reduces charcoal consumption and eliminates any chances of charcoal falling under the ribs.
The Snake Method
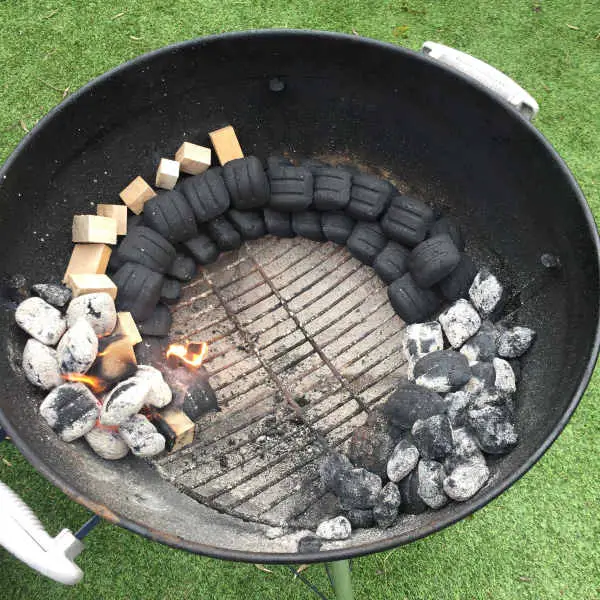
Sometimes called the fuse method, it takes a bit more time and effort than the bank method above.
Arrange the charcoal into a snake/fuze in a 1/2 or 3/4 circle and place a few lit pieces of lump charcoal or briquettes at one end of the snake.
Then place the ribs in the center.
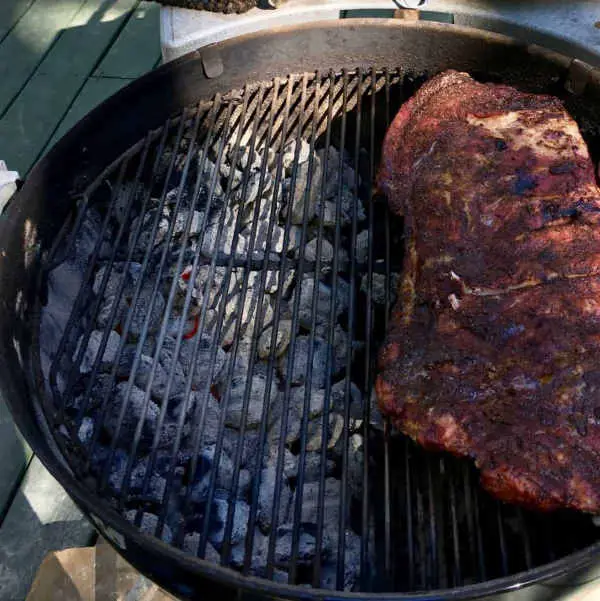
3. Start Cookin’
- Place the ribs meat side down and away from the heat
- Cook them for about 3 – 4 hours, depending on how tender and juicy you want them
5. Enjoy
Take the ribs off the grill.
Side note: Out of many charcoal grills, the Performer did this job the best. Read why in this in-depth review.
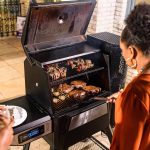
How to Slow Cook Ribs on a Weber Pellet Grill
Now we’re making smoke.
This is my favorite method because I don’t have to put in a lot of effort as the grill does most of the work for me.
1. Prepare the Ribs
- Rinse the ribs
- Remove the silver skin/membrane
- If you don’t, it becomes like rubber once cooked
- Also, the seasoning won’t penetrate the meat that good
- See this video on how to do it fast and simple
- Dry the ribs by patting them with a lint-free towel
- Add the rub
- Be generous
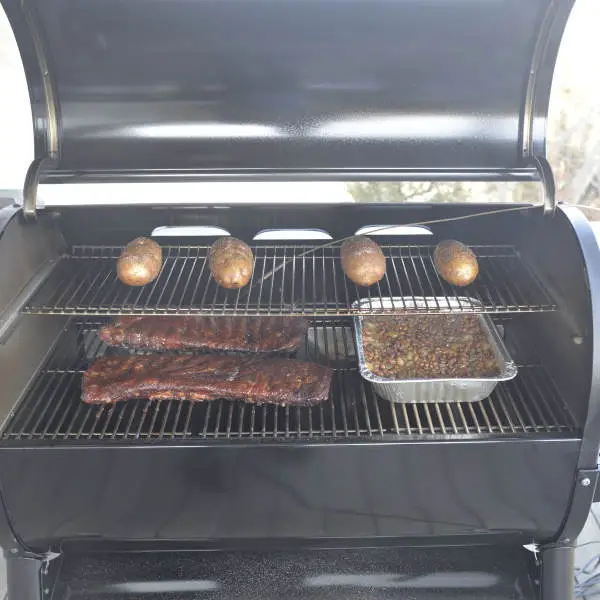
2. Prepare the Grill
- Place a foil pan between the grate and the flavorizer bars
- Fill it with water
- Set the temperature to 225°F / 110°C
3. Start Cookin’
- Place the ribs meat side down
- It doesn’t matter where you put them because there’s no direct heat. You can even place them on the upper rack
- Cook for about 4 – 6 hours, depending on how tender and juicy you want the ribs to be
4. Enjoy
Take the ribs off the grill.
Cooking Tips
Turn on SmokeBoost once you placed the ribs on the grill for a couple of hours. This increases smoke and lowers the temperature.
Spray the ribs every few hours with diluted apple cider vinegar. It makes the ribs juicer and prevents the meat from drying out.
An hour before they are cooked, brush the ribs with a thin layer of BBQ sauce and place them back on the grate.
Side note: The SmokeFire is the only series of pellet grills Weber has. I tested it previously and was amazed by the results.
Tips and Tricks on What to Do and Not to Do
What to Do
Spare No Expense
I’m not talking about paying a grand for a grill but about the meat itself.
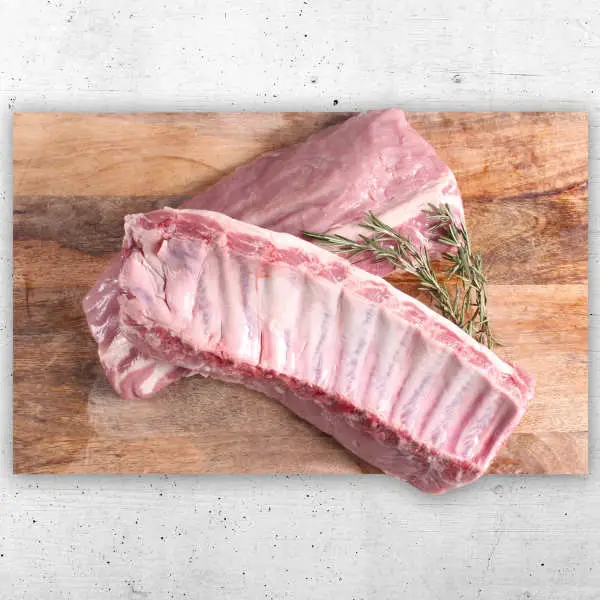
Don’t buy that cheap-sh*t ribs at your local grocery store. You know, the one that has the sticker “50% off”.
Just don’t. It won’t be the same.
Spend a couple of bucks more at your local butcher and get the freshest and juiciest cut available.
Remove the Silver Skin
It only takes a couple of minutes and it’s not really hard.
The smoke and the seasoning will better penetrate the meat, making it even juicier and tender.
Don’t Underestimate the Power of Dry Rub
The dry rub is a major part of the flavor.
Even if you’re not a fan of seasoning, a simple combination of salt and pepper does wonder.
What else you add, is entirely up to you.
I usually add onion and garlic powder, cayenne pepper, paprika, and cumin to the mix.
Use Mustard Before Applying the Rub
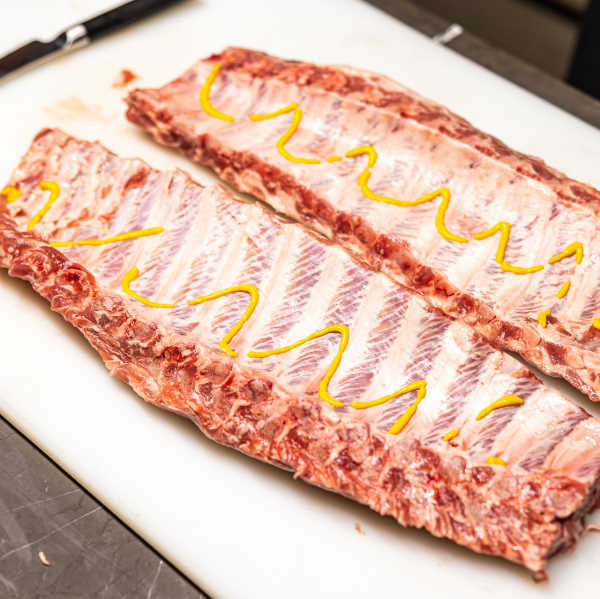
Adding a few squirts of mustard on each side improves the flavor and acts as glue for the rub.
Don’t go overboard as the mustard might flake once the ribs are done.
Use High-Quality Fuel
This doesn’t apply to gas grillers but charcoal and pellet ones.
Pellet grillers must also be aware of the type of pellets they are going to use. There are many types of pellets and not all of them go with ribs.
Hickory, maple, cherry, and apple are some pellets worth considering.
Experiment
This is not a cooking class. Gordon Ramsey isn’t evaluating you.
Don’t follow the recipe to the letter. That’s boring.
Modify the rub, lower/increase the cooking temperature and/or smoke, foil the ribs, the next time don’t, etc.
Grilling is just as a science as it is art.
What to Avoid
Boiling Ribs
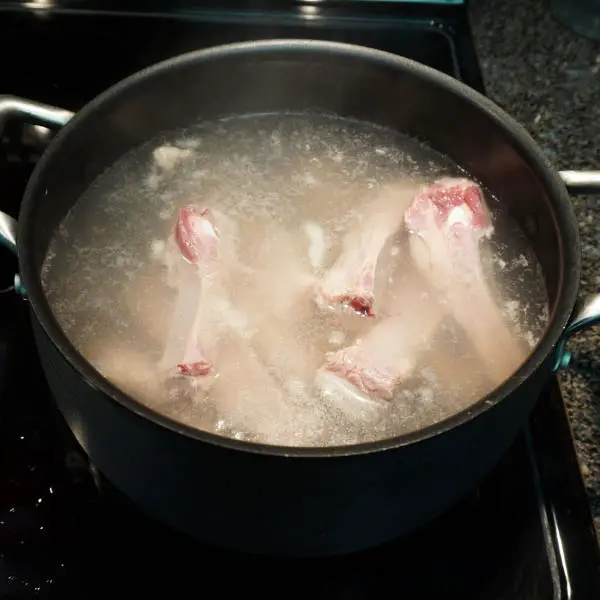
Some people do this to reduce cooking time.
What they don’t know is this removes quite a lot of flavor.
Being Impatient
Ribs need time to cook properly.
If you don’t have the time, don’t bother and just go to a restaurant.
You may also be tempted to increase the temperature. Don’t do it!
The meat won’t be that tender.
Not Checking the Temperature
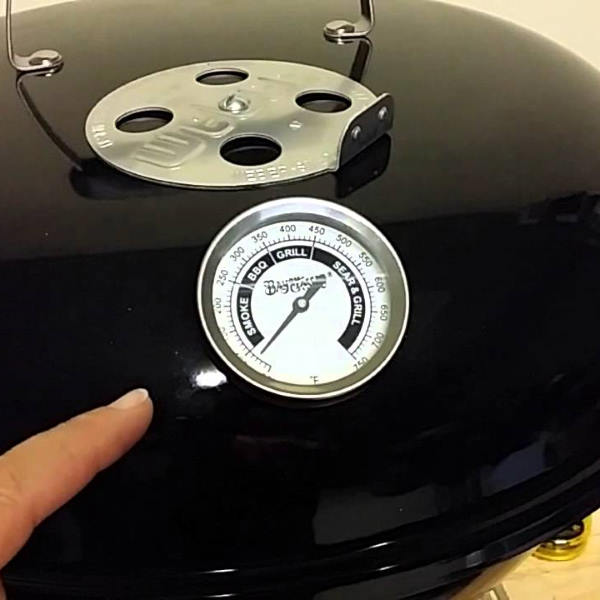
Although gas and pellet grills don’t need much attention in this department, it still won’t hurt you to check the thermometer every now and then.
Even though pellet grills have their own “set it and forget it” philosophy, malfunctions still can occur.
Don’t get me started on charcoal grills. Sometimes they are a pain in maintaining the temperature and every seasoned griller that has smoked on a charcoal grill knows this.
Going Overboard With the Rub and/or Smoke
This is a prime example of “less is more”.
The best ribs aren’t the ones that have the most seasoning or the ones that have the most smokey flavor.
So don’t overdo it.
Peeking Way too Often
Open the lid only when you must like adding fuel or sauce.
A peek here and there won’t do any harm but if you do it regularly (say every hour or 30 minutes), you’ll reduce the smoke and increase the cooking time.
The Foil Dilemma
Should You Wrap Ribs in Foil When Grilling?
There is no right or wrong answer here.
This completely depends on your taste and the time you have.
If you check other sources online, you’ll find out that some foil their ribs and others do not.
Others, on the other hand, first smoke the ribs without foil in the first half of the cooking process and then wrap them tightly in several layers of foil. This is called the “Texas crutch”.
Wrapping the ribs in foil prevents the smoke from infusing the meat while preserving moisture.
See the in-depth video below for more info (warning: it’s long):
Patience Is Key
Slow cooking ribs on a Weber grill (or any other, for that matter) isn’t really that complicated.
You need a bit of knowledge and a lot of patience.
By following the steps, tips, and tricks listed in this grilling guide, you’ll become a pitmaster in no time.
Be the first to comment