In some cases (maybe you’re in one now), you need to sharpen your beloved knife but you don’t have a sharpener nearby. Either you’ve misplaced it or you’re in the great outdoors.
Fortunately, there are many objects near you that you can use as improvised sharpeners.
Of course, you should know that most won’t do as good a job as an actual sharpener (some merely hone the edge), but this trick works in a pinch.
First, I’ll be explaining the difference between actual sharpening and honing. This part is quite long and informative.
If you don’t want to read it, you can skip it and go straight to the point.
In the second part, I will show you with which household items you can sharpen your knife (most of them include a video tutorial). These items include things that you can find in virtually any home and some that are less common.
Lastly, I’ll explain what you should avoid and why.
Before We Dive in: Sharpening vs Honing
There are 2 terms when it comes to “sharpening”: sharpening and honing.
At a glance, both terms mean the same (making the knife sharp) but they have different meanings.
Just like grilling and barbecuing, sharpening and honing look similar but are quite different.
What Is Sharpening?
Sharpening a knife means either making or repairing the edge by making it sharp or sharper.
What Is Honing a Knife?
Honing means maintaining an edge that’s already sharp.
In other words, when you’re honing an edge it means you’re making it smooth.
You see, every time you cut something, the edge becomes a bit bent. The same applies after you’ve sharpened a blade.
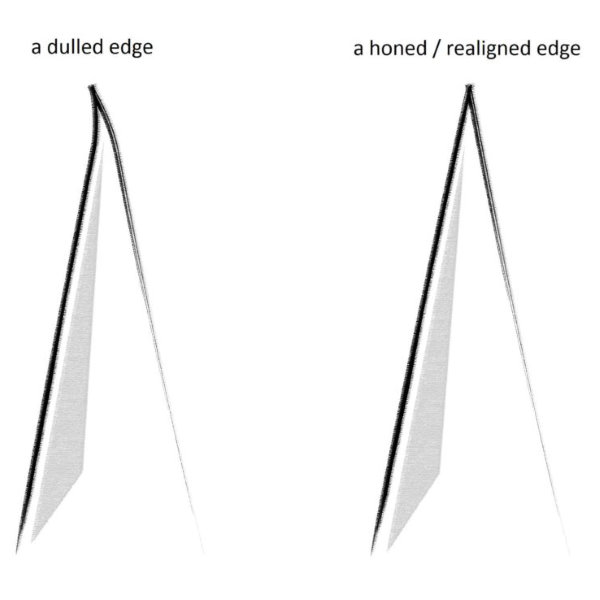
You can’t see this with the naked eye because it’s happening on a microscopic level.
When you hone a knife, you straighten these dulled or bent edges.
What Is the Difference Between Honing and Sharpening a Knife?
Imagine you’re sanding a two-by-four or a sheet of metal with sandpaper.
If you use coarse, let’s say 80-grit, the surface feels rough. But if you use very, very fine like 5000-grit, the surface feels silky-smooth.
Here’s the thing: you can’t use the latter for everything. It’s made for fine-tuning. You can’t remove thick layers of paint, for example with it because it would take ages.
This is where the coarse sandpaper comes in. Even by hand, removing this thick layer would be much faster than using a fine one.
To do this job properly, you need to first remove the paint with coarse sandpaper, then make the surface smooth and nice with fine sandpaper.
The same applies to sharpening a knife. When the edge is dull, you first sharpen it, then you hone it.
Don’t believe me? Try it. Sharpen your knife with a stone or mug and gently feel the edge with the tip of your finger.
You’ll notice that it’s rough, kind of like a serrated knife.
With honing, you remove this “roughness” by making the edge smooth.
This is why most sharpening tutorials and experts recommend honing after sharpening.
How to Sharpen a Knife With Household Items
These items include:
- Coffee Mugs and Ceramic Plates
- Glass Jar or Bottle
- Car Window
- Sandpaper
- Nail File
- Rock
- Scissors
- The Nylon Strap of a Backpack
- Leather Belt
- Cardboard
Each method has its own guide below. Most of them include a video tutorial.
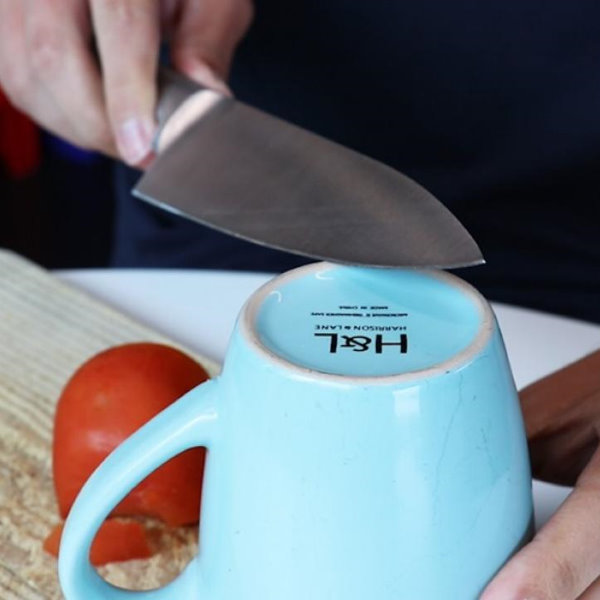
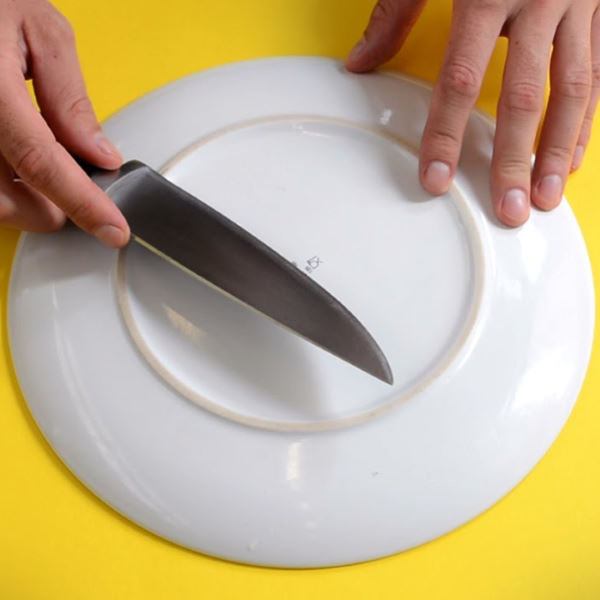
Coffee Mugs and Ceramic Plates
This method has saved my bacon plenty of times.
It’s incredibly simple:
- Flip over the mug or plate
- Run the edge along the unglazed rim (that ring that contacts the table)
Maintain an angle of about 20 degrees. If you aren’t sure what 20 degrees look like, then tilt the knife so that the whole edge touches the rim.
How long should you sharpen the knife, depends on how dull it is.
I recommend you sharpen each side for about 15 seconds (or 30 total) and see where this leads you.
If it feels sharp, you’re done. If not, repeat.
Glass Jar or Bottle
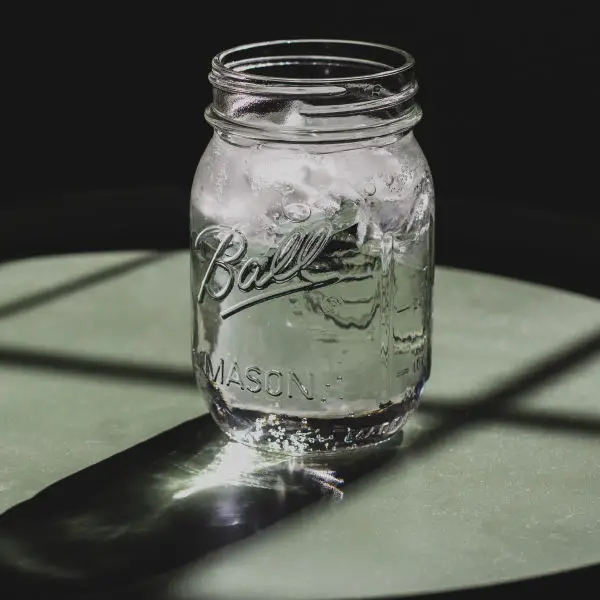
Unlike the mugs and plates, you don’t need to flip the jar over but the principle is the same:
Run the edge along the top rim at a 20-degree angle.
Know 2 things before you start looking for a jar:
- It takes longer to sharpen a knife than a mug
- The end result isn’t as good (it’s even worse if you use polished glass)
You can even use a broken bottle or another piece of broken glass but there’s a chance you might cut yourself. It’s better to avoid this method and use it as a last resort.
Car Window
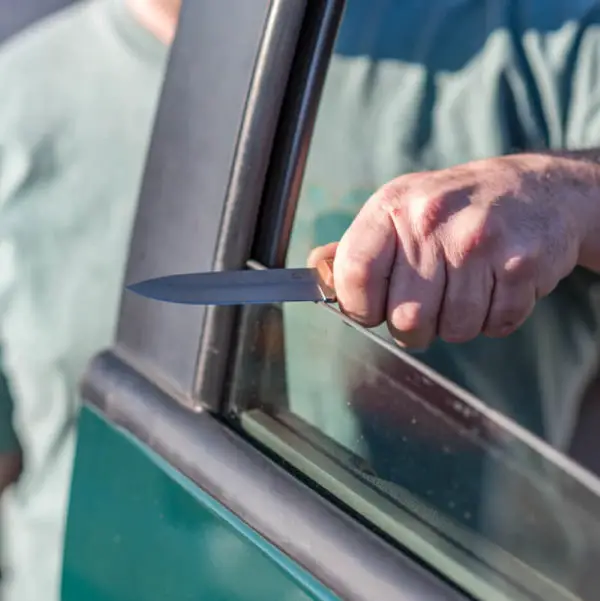
When you hit the road, most of us go with a car, RV, or another vehicle, making this technique a life-saver.
Slide the blade 10 times on each side over the top of the window.
Be careful when doing this. Although car windows are tougher than regular glass this doesn’t mean they’re unbreakable.
You can either damage the top if you’re too rough or make a crack if you’re too fast, have a muscle spasm, or sneeze.
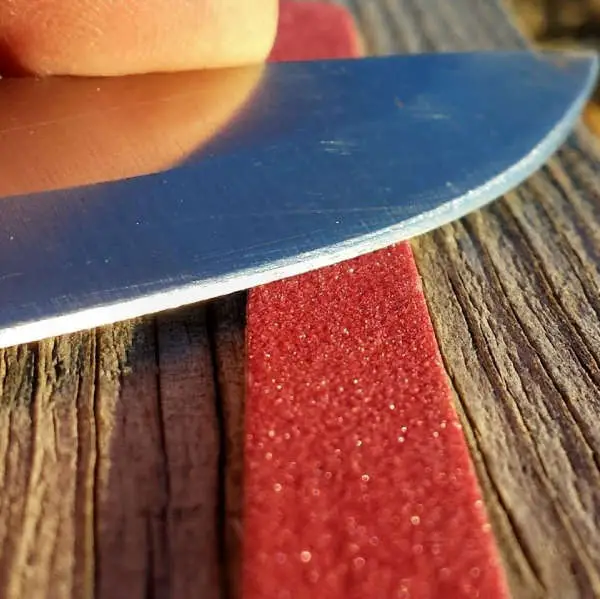
Sandpaper
- Clamp or tape the sandpaper on the surface so it won’t run away during sharpening
- If you want to be really classy, there are loads of tutorials out there that show you how to make your own sharpening block from a piece of wood and sandpaper
- You can also place the sandpaper on an old mouse pad for better traction
- Spill water on the sandpaper
- Slowly run the edge over it at a 20-degree angle
For best results, start with coarse (320 grit) and move your way towards finer sandpaper (800, then 1,500).
Take your time, this might take a while.
Nail File
It’s just like sandpaper. Also, what woman doesn’t have one?
Run the blade against it, just like you would on an actual sharpening stone or sandpaper.
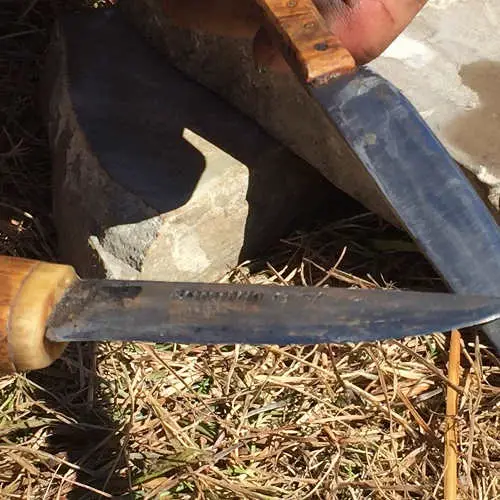
Rock

Grab the flattest rock you can get.
You can do this with a dry rock, but to get the best result either submerge it whole in water for a few minutes or take one straight from a river (if you have one nearby, of course).
Flat rocks tend to be thin, so there’s a big chance of an injury. To avoid this, place the knife on the ground or another stable surface and run the rocks across the edge.
Scissors
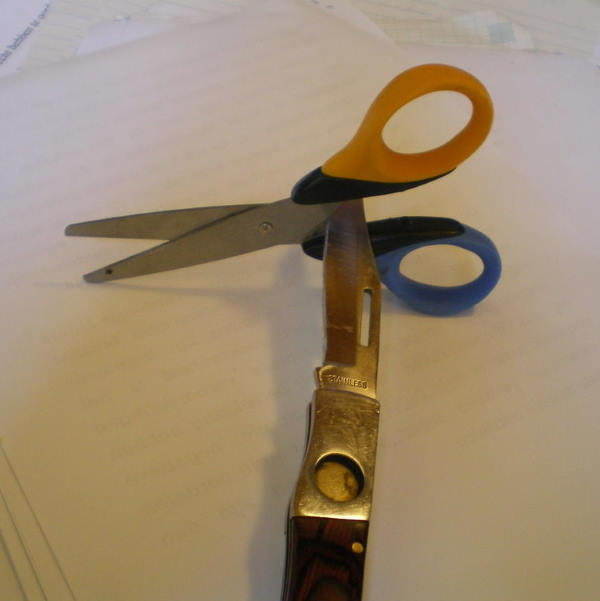
Even a pair of regular scissors can be used as a makeshift sharpener.
- Place the knife as in the picture
- Pay attention to the angle. It shouldn’t be 90 degrees but rather about 70 degrees
- Pressing hard, move the knife back and forth several times
Use these 3 methods below to hone your knife after sharpening it or to fine-tune it:
The Nylon Strap of a Backpack
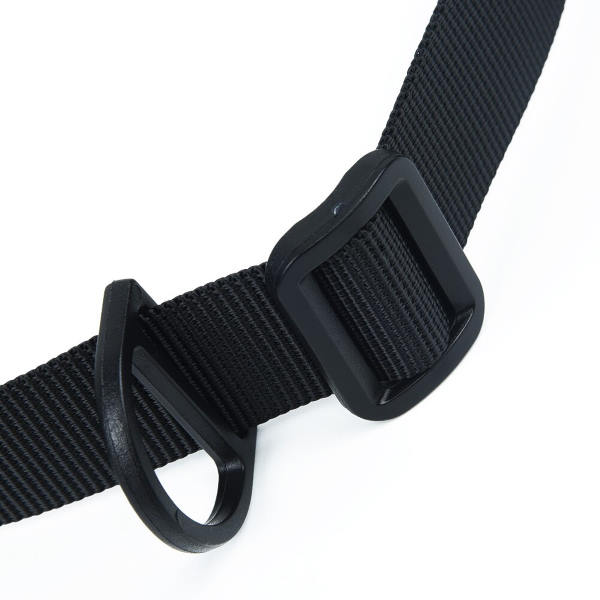
- Hold the strap firmly so it’s tight
- Run the edge across it a few times
Be careful using this method as you can quickly cut the strap if you don’t pay enough attention.
Leather Belt

This method was commonly used by barbers to sharpen their razors. Today, it’s very popular with hunters and outdoorsmen.
Make sure it doesn’t have any stitching.
- Tighten the belt
- (Optional) Wet the surface
- Run the blade away from the edge
Cardboard
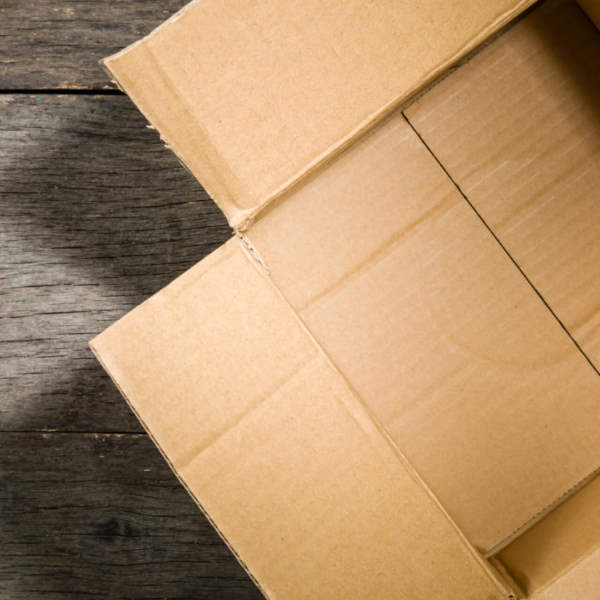
It’s not as effective as the other 2 methods but it still works.
What’s great about it that you don’t have to be careful doing it. It’s a great excuse to get rid of that empty cardboard box that you’ve been planning to throw away but always found an excuse.
Simply run the blade across the cardboard away from the edge while maintaining the 20-degree angle.
Less Common Household Items to Sharpen Your Knife With
These items aren’t as common as the ones above but are still worth mentioning:
- Angle Grinder
- Bench or Belt Grinder/Sander
- Dremel
- Shovel
- Mug and Food Processor
- Drill
In the end, I’ve included one bonus item which I’ve found the most ingenious.
The first 2 methods make use of grinders and sanders. While these two are quick and effective, they can damage the blades by making them too thin or worse, grinding them off completely.
You’ve been warned.
That’s why you should make just a few passes on each side.
Angle Grinder
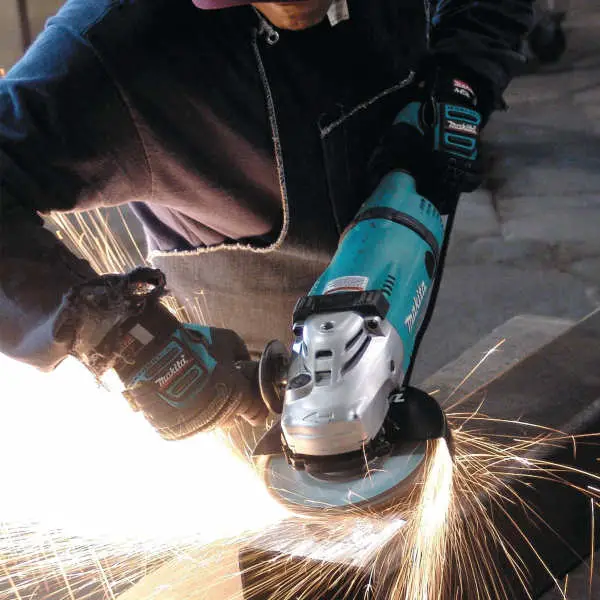
What I really like about this method is that you don’t need to use any pressure as the spinning disc does the job for you. You only need to maintain the angle.
Also, it’s very fast. Usually, a few seconds on each side is more than enough.
- Place the grinder on its back so the disc is facing up
- Place the correct disc
- The grinding one, not the cutting one
- Fire it up
- Run the blade of the knife across the edge of the disc all the while maintaining that angle of 20 degrees.
Bench or Belt Grinder/Sander
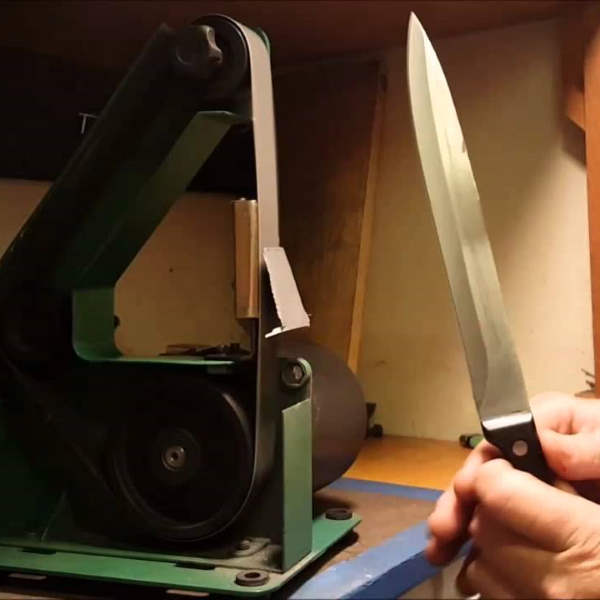
This method is pretty much the same as the angle grinder above except these machines are stationary and, therefore, more stable.
- (Optional) Lube the blade with oil or water
- If you lube the belt or the stone, there’s a risk of damaging the machine
- Make a few passes on each side while maintaining an angle of 20 degrees
A quick note before watching the video below: the video suggests a 45-degree angle, but this is a bit too much. Use the standard 20 degrees for the best results.
Some folks have gone a step further and purchased or even made their own sharpening wheels for the bench grinder.
Dremel
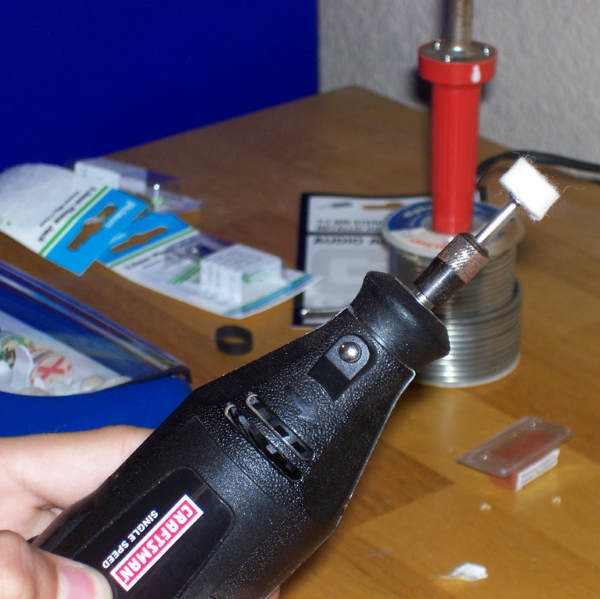
A dremel is just a miniature handheld version of a bench grinder.
This is why it takes more time to sharpen the knife.
Hold the knife firmly and steadily while running the dremel across the blade with the other.
Do it slowly so the dremel doesn’t slip and start grinding other parts of the knife.
Shovel
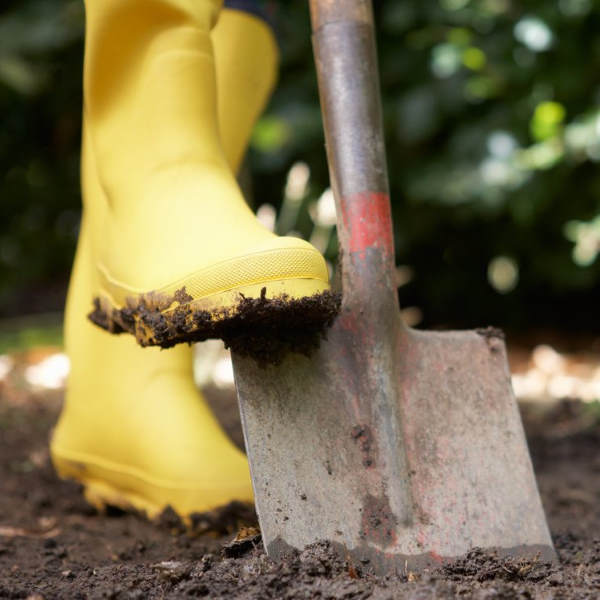
Most homes with a garden or backyard tend to have one.
Tip: Use either a titanium or steel shovel. Avoid aluminum ones because they’re softer than your knife.
- Place the shovel vertically (the blade must be at the bottom). Hold the shaft with your non-dominant arm (usually the left)
- Place the edge of the knife on the footrest
- Run the knife across the rest at a 20-degree angle with the blade looking away from the shovel.
- Flip the knife. Repeat, this time run the blade towards the shovel
Mug and Food Processor

While it’s an amazing and creative way to sharpen your knife, you need to set up this jig which takes some time and skill.
You need to remove the pitcher and secure the cup on one of the attachments (the person in the video used a grater attachment and secured the cup with strips from an old bicycle inner tube).
I suggest you do this only if you have the time and willpower.
Drill
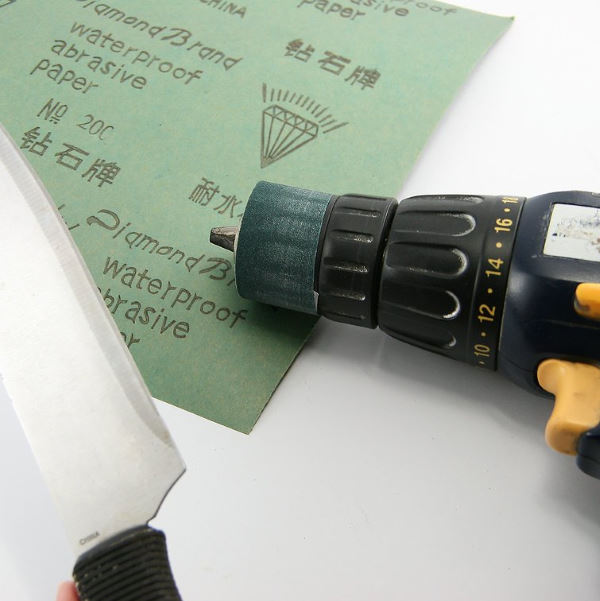
For this, you’ll need:
- A drill
- Coarse (200 or 300-ish grit) sandpaper
- (Optional) Fine (400-ish grit) sandpaper
- Scissors
- Tape or glue
Once you’ve made the jig:
- Cut a thin sheet of coarse sandpaper about the same width as the chuck of the drill
- Wrap it around the chuck and cut it to length
- Make it a bit longer than the circumference of the chuck
- Glue or tape the sandpaper around the chuck to hold it in place
- Don’t glue the sandpaper directly to the drill!
- Start the drill and run the knife across the sandpaper for about 10 – 15 seconds on each side at an angle of 20 degrees
- To make the knife shiny and to polish the blade, repeat the process with fine sandpaper
BONUS: Bicycle
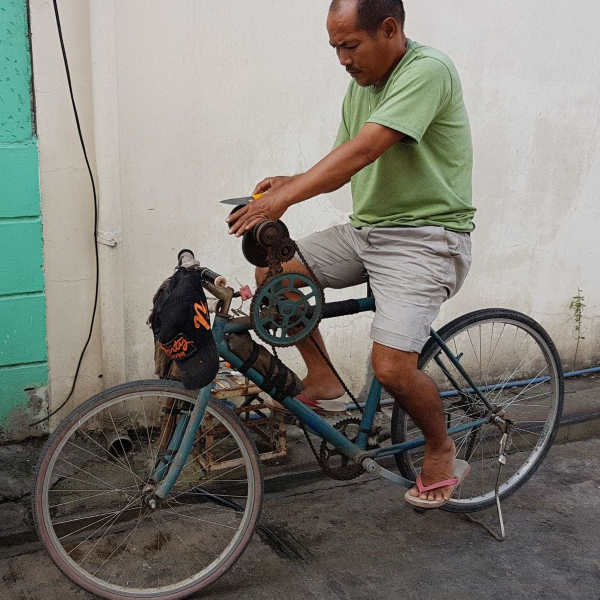
This is by far the most ingenious way to sharpen a knife (at least in my opinion) with a household item.
This conversion is a time-consuming project and I’m not going into details on how to do it as this deserves an article of its own.
I’ve included this one just because to show you how creative some people can be.
Fun fact: This used to be common about a century ago. It still is in some parts of Asia and Africa.
What to Avoid
These methods do more harm than good:
- Brick
- Concrete
- Bolt and Two Nuts
- Another Knife
Use them when you don’t any other choice.
Brick
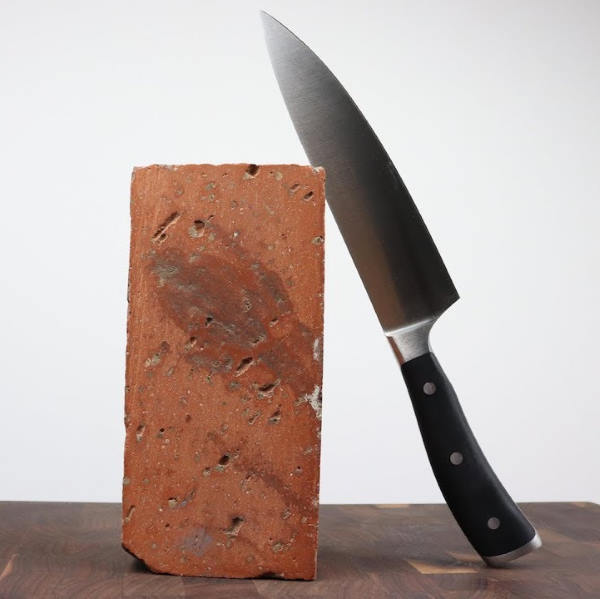
It will make the knife a bit sharper but it won’t make it razor-sharp.
The problem is with the composition of the brick: while sharpening, you’re shaving the brick. These shavings, in turn, dull the knife.
For simple tasks like cutting open boxes, this technique will suffice. But for shaving and other precision cutting, it does more harm than good.
Also, you’re damaging the edge with every stroke. So, use this method sparingly.
But even after reading this you’re feeling adventurous, at least spill some water before placing your beloved knife on it.
Concrete
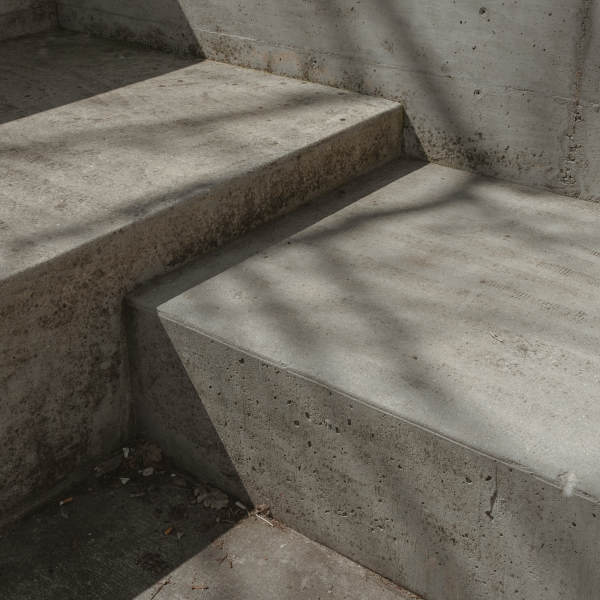
The main problem with concrete is that it’s rough even when it’s smooth.
Use it only in an absolute emergency and spill some water before sharpening to minimize damage to the blade.
Bolt and Two Nuts
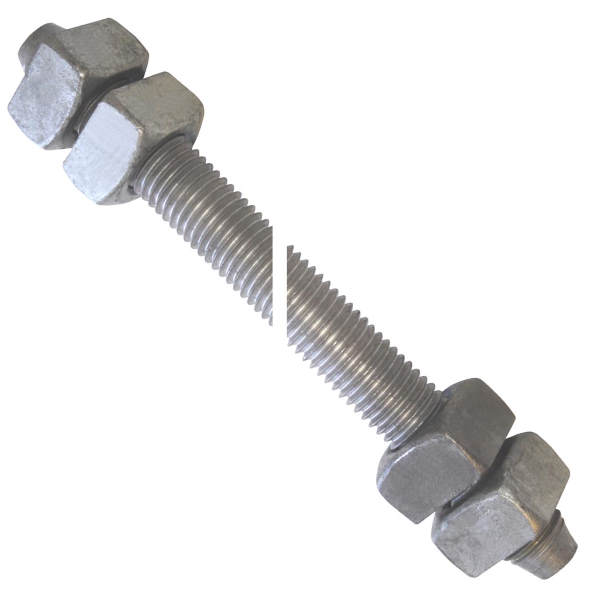
I’ve seen and heard of this trick many times.
I’ve sharpened several knives using this method and the results were the same every time: it made it worse.
The knives were duller than before.
Why is this so? Although both the knife and the bolt sharpener are made from steel, the knife is made from harder steel.
Another Knife
It looks cool but in reality it’s highly ineffective.
What’s more, you’ll damage the other knife: the spine will become full of burrs.
It won’t harm your fingers but can scratch the inside of your pockets.
Improvise. Adapt. Overcome
It’s not the end of the world if you need to sharpen a knife but can’t find a sharpener. With a little ingenuity and practice, your knife will as sharp as ever – anytime and anywhere.
These methods are great if you need to sharpen your knife in a pinch or you’re in the wild, but nothing beats an actual sharpener.
Be the first to comment